Growing up the only Advent calendar I had are the ones that look like this below.
I didn’t really know what an Advent calendar was until I saw many mommies on Instagram & Pinterest posting them. I looked up what it was, and it is such a great idea! My family and I celebrated 13 days of Christmas where we fill one another’s stockings with small gifts. However, Advent Calendar is celebrated for 24 days, and each day has an activity, gift, or prayer. I’ve never practiced this before, and it will be my first time with my family. I wanted to start another new tradition to keep the spirit of the holidays alive in my home.
I looked up designs on Pinterest, and there are hundreds! You can either make it or buy it. The ones people make are so amazing and crafty! I wish I can do that! However, I am not a very artsy and crafty person. My mom always helped me with that area during my grade school days. I wanted to make something, easy, simple, and fun. As my son gets older, I may get a little craftier and make it unique. But, while he’s only 2 years old, my main focus are the activities we are going to do during Advent.
Materials:
-25 Wooden Clothespin
-Yarn or Ribbon
-Red Acrylic Paint
-Paintbrush
-25 small envelopes or labels w/ pockets
-Print out of your activities or prayers.
-Heavy-duty tape
-Chalkboard, easel, poster board, or just a blank wall
-Stickers & Decorations (optional)
Directions
1. Paint clothespins red & let dry
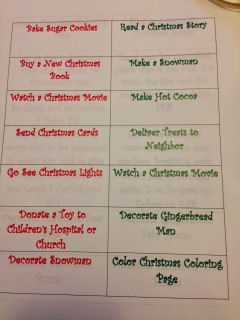
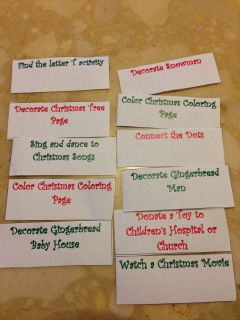
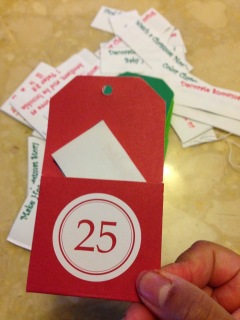
2. While the clothespins dry, print & cut out activities you would like to do or make. Stuff them inside the envelopes/labels.
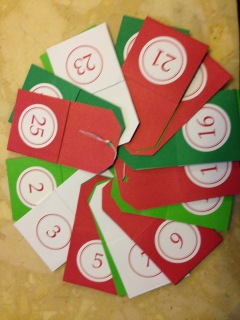
I bought the labels w/ pockets from Michael’s with numbers 1-25 already on them.
If you can’t find labels like these, you can either print out & paste numbers OR you can just write the numbers with a marker.
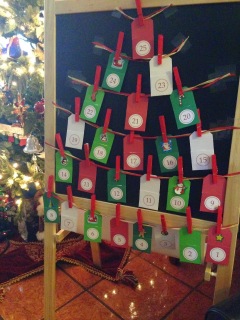
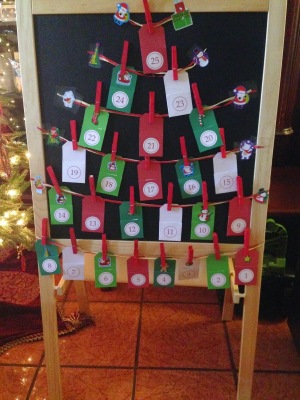
3. I decided to use my son’s easel. You can use a poster board, or a blank wall, or even your door!
Measure where you want the labels & yarn/ribbons to be placed.
I wanted the calendar to look like a tree, so I added 6 ribbons, from smallest to largest.
4. Clip each envelope on to the yarn/ribbon. The clothespin & ribbon was getting too heavy on the board & kept falling off, so I used a lot of tape on both ends to keep it secure.
I then added stickers to the ends of each ribbon because I didn’t like how the tape looked.
Viola! All done 🙂 A little tip while making the activities. Make sure to check what your plans are for that day or week so you can plan out the activity. Holidays are busy, and to make it fun for your kids make sure you stick to what the daily activity on the calendar. So look at your calendar before stuffing each envelope with an activity.
Activities can be simple, free, and fun. No need to spend or go out of the house. You can find things around your house, or find some holiday worksheets and printables online! That’s what I did.
Samples of activities are:
-Make hot cocoa
-Watch a Christmas movie. (You can find plenty on Netflix)
-Bake sugar cookies
-Send Christmas cards
-Decorate cookies
-Read Holiday books
-Visit a neighborhood or event of Christmas lights
-Take a picture with Santa
I’ll be posting our Advent Calendar activities daily, starting December 1st!
I hope you try this out if you want to make a calendar last minute! Even if it’s not the best looking, it’s keeping the spirit of the holidays alive that matters! Did you make an Advent calendar for your family too? If so, I’d love to see it! What activities did you include?
Enjoy! & Have a HAPPY THANKSGIVING!






I love that you used the easel for this!
LikeLike
I love your advent calendar. I know tomorrow is December but I'll have to try something similar with the kids, because they truly do love counting down to the big day!!! Super cute, I pinned!
LikeLike
Thanks, Jennifer!
LikeLike
Thank you, Heather!
LikeLike